Create and Schedule Your Offerings
In our previous post, we introduced you to building your free website using OfferingTree’s user-friendly tools. But, that’s just the start! Did you know we also offer space to easily promote your offerings and schedule as well as allow you to collect online payments from your clients? These features combined provide you with a robust suite of tools to market your wellness or fitness practice to the world! In this post we’ll go a little deeper into how OfferingTree supports you in creating and sharing your offerings with your community. Get started by signing into your site using the email and password you used when you initially signed up and built your website.
Create Offerings
Offerings are the services you provide to the world. It might be a weekly meditation class, a personal coaching session, private dance lessons – or whatever you’re passionate about sharing with your community! It’s important to note that creating an offering is different to scheduling an offering. Think of offerings as the category of service that you provide, so retreats, group classes, private lessons, and so on. To create an offering, follow these steps
- Start by navigating to the admin section of your website. From your dashboard, find ‘Offerings’ located in the menu on the left-hand side. You’ll find it under the ‘Manage Schedule’ section.
- Click on ‘Offering’ and you’ll be directed to a new page where you can select ‘Create Offering’ seen at the top of the page. A new pop-up will appear and you’ll simply fill in the details: category of your offering, name, a short description, and image (choose from our stock image gallery or one of your own).
- When you’re satisfied with your Offering, press ‘Create’ and voila! You’ve just created your first offering. If you’d like a visual tutorial of this process, take a look at this video.
Add Your Schedule
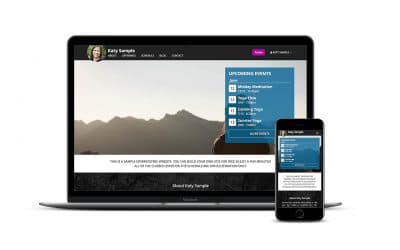
Now that you have your offerings in place, it’s time to add these offerings to your schedule so people know when and where your offerings take place. Visitors to your website will also see your upcoming schedule on your homepage and the full schedule on the schedule page of your site. To access the schedule feature, go ahead and follow these easy steps:
- Sign into your OfferingTree site and navigate to the admin dashboard of your website.
- On the left-hand side menu, look for ‘Schedule’ located under the ‘Manage Schedule’ submenu. Click that and you’ll be taken to a new page with a calendar.
- To schedule your first offering, click the ‘Add’ button on the date of your offering. A new window will open and from here you can fill in all of the details: choose your offering, set the time, date, whether it’s a repeating event, location, price, and capacity (Note: You will need to set up payment processing in order to accept class fees. You can take a look at how to do that here.)
- Once you’ve finalized the details, go ahead and press ‘Create.’ Well done! You’ve just scheduled your first offering! Feels good, right? If you’d like to see how this process looks, take a look at our scheduling tutorial video.
Do you also take one-on-one appointments? If so, you can set up your offerings to accept appointments. Check out this video for how to start accepting appointments with OfferingTree or follow these quick steps:
- Put in your general availability to accept appointments. Navigate to ‘Manage Schedule’ from the admin side of your website and press the ‘Enable Appointments’ button.
- Once you have a schedule of your availability, edit or create an offering to enable appointment bookings. When you’re editing or creating an offering, there is a checkbox for enabling appointments. Check that and fill out the required information and save the offering.
- You’re all set up! Now when people view your offerings page, they can book an appointment and pay online right from your website.
As you’re setting up and scheduling your offerings, keep in mind these additional notes:
- You can choose to turn on registration so you know who is coming to your scheduled offerings and update them if there are any changes.
- Accept online payments or donations for your scheduled offerings to save you time and money. People are more likely to show up if they have prepaid plus check in time is greatly reduced if they don’t have to fumble with cash or credit cards while checking in. Watch our tutorial on how to set up payment processing.
Next Steps
Now that you’ve set up your website, offerings, schedule, and payment processing, you are well and truly on your way to bringing your passion into the community! We hope this has been a useful guide but as always, we are here to help if you get stuck. Shoot us a note to [email protected].
In the next post, we’ll teach you how to personalize your site by adding additional pages and a custom domain. We’ll also go over how you can create a blog and newsletter on your site to grow your audience.


